Canon Printer Setup WiFi - Easy Steps
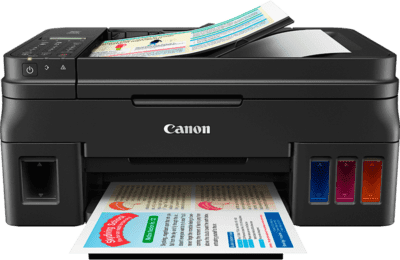
Table of Contents
Canon products have been spread throughout the world and it has been many successful years that the brand has been collecting a loyal user base. It is a globally reputed brand that provides tons of consumer and commercial products.
These products include cameras, scanners, printers, and the like. Here, in this read, we’ll be talking about the Canon printer wireless setup. Yes, that’s right, we’ll be helping you through the set-up procedure for your printers.
You should know that Canon offers products that specialize in products in the imaging, industrial and optical segments. Also, as technology evolved, Canon evolved too- it started manufacturing both wired and wireless (runs on Wi-Fi) printers.
The printers have been acquiring a lot of utility and recognition across the world and that led us to craft the Canon Printer Setup read. You’ll get to know the steps to manually set up your Canon Printer along with installation steps for other operating systems via ij.start.canon.
Product To Get Started
Understand the Canon printer setup WiFi - Manual
This part of the read has been assigned to introduce you to three specific steps that are said to lead you to a successful setup for your Canon printers- preparing the Printer, installing the Print Head, and installing the ink tanks.
These three stages can help make way for a refined printing experience so, let’s move towards the steps for each stage:
Printer Preparation
- Put the printer in a safe space- flat and horizontal (Make sure there are objects kept in front of it).
- Start with opening the rear tray for extending the paper support then move to open the front tray for extending the output tray.
- Make sure to plug in the power cable to the rear of the printer (in the socket) and the other end into the wall socket.
- Place a hit on the “Power” key of the printer and go to opening the Top Cover of your printer to finish the first stage of your Canon Printer Setup.
Print Head Installation
- Move on to removing the Print Head from its package.
- Get rid of the Orange Protective Cap from the Print Head.
- Go for lifting the Print Head Lock Lever till it stops.
- Now, make sure that you’ve inserted the Print Head.
- Push the Print Head (for it to stay) and put down the Lever.
- Ensure that the Print Head has been correctly installed.
Ink Tank Installation
- Moving on, get rid of the orange tape in the given manner.
- From the ink tank bottom- remove the orange protective cap.
- Put the ink tank in a slot toward the right till it is in place.
- Ensure that by doing so, the light on the ink tank turns red.
- Move to close the Top Cover to end the Canon Printer Setup.
Canon printer setup WiFi for Windows devices
This section of the read will walk you through the steps you’d have to undergo to complete the Canon Printer Wireless Setup so let’s take a peek at them:
- Initiate the procedure by turning on your printer for connecting it to the WiFi network you use.
- Move on to using a web browser on your Windows Device and visit the online setup portal by Canon.
- Get the required print drivers download, open them after, and get on with the installation procedure.
- Hit on the “Windows” key (symbol) along with “R” to place the “Run” command on your system.
- When the Run dialogue box appears, type the following- “control/name Microsoft.DevicesAndPrinters”.
- Hit “Ok” and wait for the “Devices and Printers” folder to open on-screen.
- When you see the “Add Printer” option, go for it and keep up with the on-screen instructions.
- After the completion of the process, hit “Ok” and that’s the end of the Canon printer setup WiFi procedure for Windows.
Canon printer wireless setup for Mac Devices
- Initiate the process for Canon printer setup on Mac by turning on both the devices (printer and the computer).
- Move on to linking the printer to the wireless network you use for online access.
- Get into the official printer setup page by the brand and get the print drivers downloaded for moving the process further.
- Post-download, go on to the “Downloads” folder on your system, double-click on the print driver files and complete the installation.
- Get into the Apple Menu (symbol) and choose to go for the option that reads “System and Preference”.
- Next, move to select “Printers and Scanners” and hit on the “+” symbol to add your Canon printer.
- Once your printer has been successfully added, your Canon printer wireless setup on Mac is assuredly complete.
Conclusion
The detailed read above has been carefully crafted to help you with the Canon Printer Setup procedure. You get to learn about the company and the printers they provide that have been acquiring ample recognition across the globe.
In addition to that, you learn about the elaborate procedure for setting it up manually by following the “three-stage” process and also learn to perform the Canon Printer Wireless Setup via canon.com/ijsetup for Windows and Mac devices.